
The modern home is often a bustling hub of activity, demanding more versatility from its footprint than ever before. Whether you need a quiet, isolated home office, a dedicated fitness studio, a mother-in-law suite, or an expansive playroom for a growing family, finding the space can be a challenge. Moving to a larger house is financially daunting and stressful, while building a brand-new home addition can take months and cost a small fortune. Fortunately, the perfect solution might already exist right beneath your nose, disguised as a parking spot and a graveyard for old lawnmowers.
Converting a garage is one of the most efficient, cost-effective strategies for expanding your home’s livable square footage. Because the foundation, walls, and roof are already structurally sound and in place, you bypass the most expensive and time-consuming phases of traditional ground-up construction. However, transforming a cold, echoing vehicle bay into a warm, inviting residential sanctuary requires careful planning, strict adherence to local building codes, and a systematic approach.
Evaluating and Preparing the Structural Shell

Before picking up a hammer or ordering furniture, assess the structural bones of your garage. Unlike the main house, garages are built to protect cars and equipment, not humans, making them susceptible to moisture, structural, and entry challenges. These must be resolved before applying any interior finishes.
First, assess the foundation and walls for structural integrity. Look for major shifts, foundation cracks, or signs of water intrusion where the framing meets the concrete. Hairline fractures in the concrete can be sealed with epoxy injections, but major faults require professional evaluation.
Next, address the overhead door: the largest moving part. For residential conversion, you can either replace it with an insulated wall or retain an insulated decorative door if required by zoning. This modification requires specialized knowledge due to the tension in torsion springs. Professional garage door services ensure the mechanism is safely handled without compromising structural headers.
Once the perimeter is secure, address the floor. Garage floors usually slope towards the driveway and lack vapor barriers, making them prone to moisture. Clean, profile, and seal the concrete to combat this. High-performance residential floor coatings create an impermeable barrier and provide a durable, finished base layer that prevents dust and keeps out dampness.
- Inspect the concrete subfloor using a plastic sheet test. Tape a two-foot square of clear plastic tightly to the floor for forty-eight hours. If water droplets form on the underside, a heavy-duty vapor barrier is mandatory.
- Check your local building codes regarding threshold heights. Many municipalities require the finished floor of a converted garage to sit at the same height as the main house floor, which may necessitate building a raised sleeper floor over the concrete.
- Seal all perimeter expansion joints with polyurea caulking to prevent pests and moisture from seeping into your new drywall from the bottom up.
Establishing Climate Control and Energy Efficiency
If one thing ruins garage conversion comfort, it’s poor climate control. Garages are outside the home’s thermal envelope, becoming ovens in summer and freezers in winter. A continuous, high-performance thermal barrier is crucial for livability.
Insulation is key. Most garages have uninsulated walls and open rafters. To meet residential codes, install high-R-value insulation throughout. For two-by-four walls, use fiberglass or mineral wool batts (R-13 to R-15), or upgrade to spray-foam for better air-sealing. Also, insulate the ceiling; for an unconditioned attic, blow in cellulose insulation up to R-30 or more. Use qualified local insulation services to ensure complete coverage and proper vapor retarder and attic ventilation installation.
With insulation forming a shell, add a dedicated heating and cooling source. Extending existing home ductwork is rarely ideal. Existing systems are sized for the original home’s volume; adding 400 to 600 square feet strains them, diminishing comfort.
Independent zone control is optimal. Install a ductless mini-split system for quiet operation and energy efficiency without ductwork. Working with reliable HVAC installation services helps calculate the room’s precise heating and cooling needs, selecting a system that adapts to weather changes efficiently.
- Prioritize sealing air leaks before insulating. Use expanding spray foam around all window rough-ins, electrical penetrations, and where the wall framing meets the foundation.
- Consider the floor temperature. Concrete retains cold intensely; adding rigid foam insulation boards directly over the concrete before installing your subfloor will keep your feet warm in the winter.
- Install a programmable smart thermostat dedicated to the garage space so you can lower the heating or cooling automatically when the room is not actively in use.
Overhauling Utilities: Power, Lighting, and Water
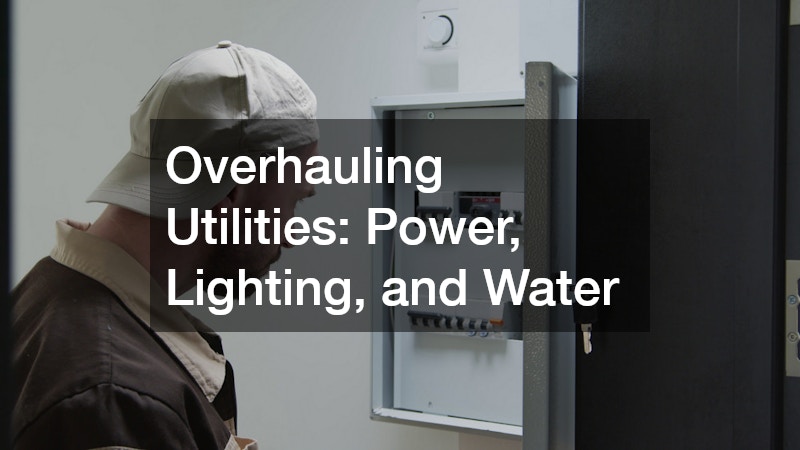
A truly functional room needs more than just a single overhead bulb and two basic wall outlets. Whether you are building an entertainment hub with high-end audio-visual systems or a fully legal accessory dwelling unit complete with a kitchenette, your utility infrastructure requires a major, comprehensive upgrade.
Electrical access is the lifeblood of any modern room. Most garages sit on a single fifteen-amp or twenty-amp circuit shared across all existing outlets and lights. If you plug in a space heater and a hair dryer at the same time, the breaker will instantly trip. For a proper living space conversion, you need to run entirely new, dedicated circuits from your main electrical panel. You will need circuits for your mini-split system, dedicated lines for any high-draw appliances, and plentiful outlets spaced along the walls to satisfy the National Electrical Code, which generally dictates that no point along a wall can be more than six feet away from an outlet. Partnering with skilled local electricians guarantees that your panel can handle the added load safely, all wiring is properly routed through the framing, and up-to-date arc-fault and ground-fault protection devices are installed to prevent fire hazards.
If your dream garage conversion involves a bathroom, a laundry utility zone, or a wet bar, plumbing becomes the next major hurdle. Unlike electrical wires, which can easily bend through studs and over ceilings, plumbing relies heavily on gravity. Disposing of wastewater requires wastewater lines to slope downward at a strict grade of one-quarter inch per foot. Because your garage floor is a solid concrete slab resting directly on the ground, installing a toilet or a shower requires cutting, jackhammering, and trenching deep into the concrete to lay new drain pipes. This is highly technical, physically demanding work that demands certified plumbing services to ensure the lines tie seamlessly into your home’s existing main sewer stack without risk of future backups or leaks beneath your new flooring.
- Draft a meticulous furniture and appliance layout before the walls are closed. Mark exactly where computers, televisions, microwave ovens, and bedside tables will go so outlets are hidden but accessible.
- Incorporate layered lighting designs. Do not rely on a single flush-mount ceiling fixture; mix recessed LED canisters for general illumination with focused task lighting and dimmable accent lights to create an inviting ambiance.
- If cutting into the slab for plumbing is cost-prohibitive, research up-flush plumbing systems or macerating toilets, which allow you to pump wastewater vertically through the walls without breaking up the concrete floor.
Maximizing Storage and Enhancing Exterior Appeal

One of the biggest psychological hurdles homeowners face when converting a garage is the sudden loss of utility storage. All those holiday decorations, lawn tools, bicycles, and bulk pantry items need to go somewhere. If you do not plan for storage during the design phase of your conversion, your beautiful new living space will quickly become cluttered, chaotic, and stressful.
The secret to successful garage conversion storage lies in invisible, integrated architectural design. Instead of using freestanding plastic bins or mismatched bookshelves, invest in custom built-in storage solutions that utilize the full vertical height of the room. By extending cabinetry all the way to the ceiling, you maximize storage volume while maintaining a clean, cohesive, high-end residential appearance. Enlisting custom cabinetry services allows you to create specialized storage zones, such as hidden workspaces that fold out of sight, deep pull-out drawers for heavy items, and seamless accent walls that mask massive storage closets behind flush, touch-latch doors.
While the interior must feel comfortable and expansive, the exterior of the garage requires just as much attention. From a neighborhood perspective, a poorly executed garage conversion sticks out like a sore thumb. If you simply slap a piece of plywood over the old garage door opening, your home lose curb appeal and value. The goal is to make the conversion look as if it was always part of the original architectural blueprint of the house.
When framing in the old garage door opening, you must match the existing exterior texture, color, and line work perfectly. Whether your home features horizontal vinyl siding, fiber cement boards, traditional stucco, or brick veneer, working with professional siding contractors ensures that the new wall sections weave flawlessly into the old, creating an imperceptible transition that preserves your home’s exterior aesthetics and long-term resale equity.
- Design built-in storage benches underneath new window installations. This provides excellent seating options while hiding deep blankets or seasonal gear completely out of sight.
- Incorporate a built-in drop zone or mudroom locker system near the new entryway to capture jackets, muddy shoes, and backpacks before they make their way into the main seating areas.
- When choosing exterior windows to fill the old garage door space, match the header heights, grid patterns, and trim profiles of the rest of the home’s front facade exactly.
Finalizing the Interior Aesthetics and Ventilation

Once the structural shell is sound, the climate systems are humming, and the utilities are hidden safely behind fresh drywall, you finally reach the most rewarding phase of the project: the finish work. This is where you officially erase the memory of oil stains and concrete dust, turning the space into a true reflection of your personal style.
Light and color play a monumental role in how large and welcoming a room feels. Garages are notoriously long, deep, and dark, often featuring minimal window exposure. To counteract this subterranean feel, you must be highly strategic with your interior finishes. Opting for a bright, reflective color palette on the walls and ceilings will instantly make the room feel wider, taller, and more open. Bringing in experienced painting contractors ensures that your drywall is perfectly prepped, primed, and coated with high-quality, durable finishes that hide minor surface imperfections while maximizing the bounce of natural light throughout the deep layout of the room.
Beyond visual aesthetics, the ultimate success of the room relies on invisible comfort factors, specifically air quality and humidity control. Because you have sealed up a space that was once completely open to the outdoors, stagnant air can easily become an issue. New furniture, fresh paint, drywall compounds, and subfloor adhesives all emit volatile organic compounds that can build up over time.
Furthermore, without proper airflow, the lower levels of a home can trap humidity, leading to a stale environment. Integrating a reliable air conditioning contractor into your final stages ensures that your ventilation setup provides adequate air exchanges, introduces fresh outside air safely, and controls internal humidity levels so your new room always smells and feels crisp, clean, and completely distinct from its utilitarian past.
- Choose eggshell, satin, or semi-gloss paint finishes for the walls. These surfaces reflect light much better than flat paints, helping brighten up rooms that have limited windows.
- Install a ceiling fan in the center of the room to keep air moving constantly, which prevents thermal stratification where hot air stays trapped at the ceiling and cold air lingers on the floor.
- Incorporate indoor plants and air-purifying greenery into your final decor to help naturally filter the air and bring a touch of vibrant life into the newly reclaimed space.
Reclaiming your garage and transforming it into an extended living space is a profound way to upgrade your home’s functionality without the pain of moving or the extreme costs of building from the ground up. By taking a thoughtful approach that prioritizes structural preparation, efficient climate control, robust utilities, and seamless architectural integration, you unlock hundreds of square feet of premium real estate that can adapt to whatever your lifestyle demands.
While the temptation to cut corners or treat the project as a simple weekend DIY task can be strong, the long-term comfort, safety, and financial equity of your home depend entirely on doing the job right. Investing in licensed, experienced professionals across every specialized discipline ensures that your new room meets strict modern building codes, stands up beautifully against the elements, and delivers a flawless, integrated space that your family will cherish for decades to come. Take your time, plan meticulously, and watch your underutilized vehicle bay transform into the most popular, comfortable room in your entire house.