
An underutilized basement is often a home’s greatest untapped asset, initially serving as storage for holiday decorations, outgrown toys, and forgotten fitness equipment. Beneath those exposed joists and concrete floors lies the exact footprint of your home, ready to be transformed. Converting this space into a vibrant, comfortable family room boosts property value and provides a dedicated area for movie nights, video game tournaments, hobby zones, and relaxation.
A basement renovation requires a specialized approach due to challenges related to moisture, temperature fluctuations, ventilation, and structural obstacles like support columns and low-hanging utility lines. Addressing these foundational issues before moving to the aesthetic phase is crucial. A successful conversion prioritizes safety and structural integrity before selecting paint colors or furniture.
Diagnosing and Halting Moisture Intrusion
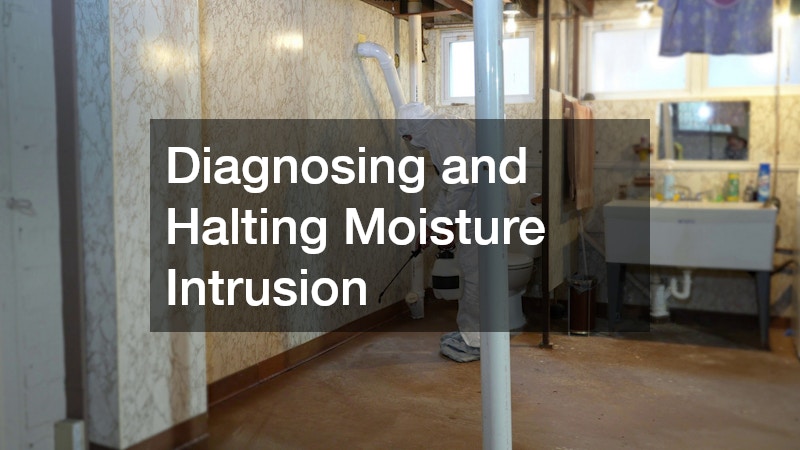
Before a single piece of framing lumber arrives at your house, you must absolute guarantee that the space is entirely dry. Moisture is the ultimate enemy of below-grade construction, and even a minor capillary leak through a foundation wall can ruin expensive drywall and flooring within months. Start by conducting a thorough inspection during or immediately after a heavy rainstorm. Look for tells like efflorescence, which is a white, powdery mineral deposit left behind on concrete walls when water evaporates. Check for damp spots along the seam where your basement floor meets the foundation wall, as this is a prime location for hydrostatic pressure to force water upward.
To mitigate exterior moisture before it ever reaches your foundation, implement these immediate fixes:
- Extend downspouts at least six feet away from the home’s foundation to prevent water pooling.
- Re-grade the soil surrounding your home so that it slopes downward, dropping at least six inches over the first six feet away from the exterior walls.
- Keep gutters clean and free of debris to prevent water from overflowing directly next to the basement footprint.
- Seal minor hairline cracks in the interior concrete walls using a high-quality hydraulic cement.
If your basement exhibits chronic dampness, persistent puddles, or signs of weeping walls, standard DIY patches will not suffice. For deep-seated or structural water issues, homeowners must consult with professional waterproofing companies to install comprehensive internal drainage systems, sump pumps, or exterior French drains to ensure the perimeter remains permanently dry.
Tackling Hidden Environmental Hazards
Older basements, particularly those that have been partially or poorly finished in the past, often harbor hidden environmental dangers. When porous materials like old drywall, wood paneling, or fiberglass insulation are exposed to high humidity and stagnant air, they become ideal environments for organic growth. Before you begin tearing down old structures or building new walls, put on a high-efficiency respirator and inspect the dark, enclosed areas of the space, such as the cavities between floor joists and the spaces behind old built-in shelving.
If you discover widespread patches of black, green, or grey fuzzy growth, or if the space suffers from an intense, persistent musty odor, you must halt work immediately. Distubing these colonies can send millions of spores into your home’s central air system, creating respiratory hazards for your family. In these scenarios, it is critical to hire certified black mold remediation services to properly contain the area, safely remove infected structural components, and treat the raw masonry surfaces with commercial-grade antimicrobial agents before rebuilding.
Evaluating and Upgrading Your Mechanical Core

A basement family room will only be used if it is physically comfortable to sit in for extended periods. Because heat naturally rises and basements are surrounded by cool earth, these spaces are inherently prone to feeling chilly and drafty. Before framing begins, you must determine whether your existing HVAC system has the capacity to conditioned this added volume of air. Simply cutting a hole in your existing ductwork and adding a register rarely works; it usually ends up starving the upper floors of airflow while failing to properly warm the basement.
To ensure your existing heating equipment is up to the task, follow these essential mechanical steps:
- Schedule a comprehensive furnace service to clean the heat exchanger, test the blower motor, and verify that the system is operating at peak efficiency before adding load.
- Check the static pressure of your current duct network to see if it can handle additional runs.
- Insulate all exposed supply ducts to prevent thermal loss as air travels through unconditioned zones.
If your primary heating unit is older or lacks the capacity to safely accommodate the extra square footage, you will need to collaborate with a local hvac contractor. These specialists can run manual calculations to determine the exact heating and cooling loads required for the subterranean space. They can help you decide whether to zone your existing system using motorized dampers or install an independent system, such as a ductless mini-split heat pump, which offers localized control and exceptional energy efficiency without altering your main ductwork.
Managing Below-Grade Pipes and Utilities
Basements double as the mechanical heart of the home, housing main water shutoff valves, drain lines, gas pipes, and water heaters. When designing your family room layout, you must balance the desire to hide these utilitarian eyesores with the absolute necessity of maintaining immediate access for maintenance and emergencies. Never permanently wall off a cleanout plug, a main water valve, or gas meters. Instead, design clever architectural workarounds like hidden access panels, recessed cabinets, or decorative utility closets with louvered doors that provide ventilation.
If your dream family room includes amenities that require water, such as a wet bar, a small kitchenette, or a convenient half-bathroom, you must carefully evaluate your waste lines. Because standard home plumbing relies on gravity to carry waste down and out, plumbing a basement bathroom often means working below the level of the municipal sewer main. Overcoming this hurdle requires specialized plumbing services to break through the concrete slab, excavate a pit, and install a heavy-duty sewage ejector pump or a macerating toilet system that safely pumps wastewater upward into the main home drainage stack.
Bringing the Grid Up to Modern Code
A modern media and family room is incredibly power-hungry. Between large-screen televisions, multi-channel surround-sound receivers, gaming consoles, smart lighting arrays, and perhaps a mini-fridge or microwave at the bar, the electrical demands will far exceed what a couple of old, ungrounded basement outlets can provide. Furthermore, basement electrical work is subject to stringent building codes designed to prevent shocks in areas where moisture could potentially interact with electricity.
When mapping out your electrical layout, incorporate the following safety and functionality features:
- Plan for dedicated 20-amp circuits specifically for your home theater equipment to prevent screen flicker or audio hum when other appliances kick on.
- Space outlets frequently along the new perimeter walls to eliminate the need for dangerous, unsightly extension cords.
- Install modern LED recessed downlights, which offer excellent clearance in low-ceiling environments and generate very little heat.
To pull the necessary permits and guarantee that your new living space complies with the National Electrical Code, you will need to invest in extensive electrical upgrades. A professional electrician will replace any outdated wiring, install Arc-Fault Circuit Interrupter (AFCI) and Ground-Fault Circuit Interrupter (GFCI) protection across all outlets, and determine if your main electrical panel requires a subpanel to safely distribute the new electrical load.
Choosing Durable, Subterranean-Friendly Flooring

Selecting flooring for a basement is entirely different from choosing flooring for an upstairs bedroom. Solid hardwood is strictly out of the question; the natural fluctuations in relative humidity below grade will cause solid wood planks to warp, cup, and buckle over time. Even if your basement is perfectly waterproofed, the concrete slab itself breathes, slowly releasing water vapor upward. Therefore, any flooring material you select must be completely impervious to moisture or installed with a robust vapor barrier underneath.
Before installing your final floor covering, the raw concrete slab must be meticulously prepared:
- Perform a plastic sheet test or a calcium chloride test to measure the moisture vapor emission rate of the concrete.
- Use a self-leveling underlayment compound to smooth out dips, high spots, and imperfections in the rough slab.
- Ensure the floor is entirely clean, free of old adhesives, and structurally sound.
For homeowners seeking an incredibly durable, modern, and seamless option that can withstand heavy foot traffic, spilled drinks, and pet paws, utilizing specialized epoxy concrete services is an excellent choice. An industrial-grade epoxy coating creates a non-porous, highly customizable, and virtually indestructible surface directly over your slab, providing a sleek aesthetic that can be warmed up visually with large, comfortable area rugs.
Creating a Bright, Insulated Shell
Once the mechanical systems, plumbing, and electrical rough-ins are securely in place, you can move forward with framing the perimeter walls. The traditional method of nailing wood studs directly against raw concrete walls is highly discouraged, as moisture can easily transfer from the masonry to the wood, leading to rot. Instead, builders typically leave a one-inch air gap between the concrete wall and the frame, or they apply rigid foam board insulation directly to the concrete before building the stud walls. This creates a continuous thermal break that keeps the room cozy and energy-efficient.
When the walls are framed and insulated, the drywall installation and finishing process begins. Because basements often suffer from limited natural light due to small, high egress windows, your choice of wall finishes will heavily dictate how large and welcoming the room feels. After the drywall is taped and mudded to a smooth finish, it is wise to engage professional painting contractors. Expert painters know how to properly prime fresh drywall to prevent uneven absorption, and they can help you select high-performance, mold-resistant paints in satin or eggshell finishes that bounce light effectively around the room, making low ceilings feel significantly higher.
Adding Texture, Warmth, and Personality
With the foundational painting completed, you can turn your attention to the interior design details that transform a sterile drywall box into a cozy, character-rich family hub. Basements often suffer from acoustic issues; the hard concrete floors and flat drywall surfaces can cause sound from televisions and loud conversations to echo uncomfortably. Incorporating soft architectural textures is a fantastic way to dampen sound while simultaneously adding visual warmth and high-end style to the room.
Consider these design techniques to elevate the visual appeal of your subterranean space:
- Construct a feature wall using reclaimed wood paneling, board-and-batten, or shiplap to introduce organic textures.
- Use plush, thick area rugs over your hard flooring surfaces to define separate zones, such as a reading nook or a children’s play area.
- Install acoustic ceiling tiles or architectural drop ceilings that conceal upper-floor pipes while softening the sound profile of the room.
To create a striking focal point without sacrificing valuable floor space, consider dressing up a primary accent wall—such as the wall behind the television or the back of the snack bar—with a premium living room wallcovering. Modern wallpapers and textured textiles offer incredible depth, allowing you to introduce sophisticated geometric patterns, grasscloth textures, or subtle metallic accents that capture and reflect your ambient lighting beautifully.
Furnishing for Comfort and Function

The final step in your basement transformation journey is furnishing the space. This stage requires a strict adherence to scale and clearance measurements. One of the most common mistakes homeowners make is buying a massive, deep-seated sectional or a full-sized billiards table, only to discover on delivery day that the piece cannot physically navigate the tight corners of the basement stairs or fit underneath low-hanging structural soffits.
To avoid delivery disasters and maximize the usability of your new layout, keep these practical furnishing tips in mind:
- Measure the narrowest point of your basement staircase, including the overhead clearance and any sharp 90-degree turns.
- Opt for modular sectionals that are delivered in smaller, manageable pieces and assembled directly inside the room.
- Choose multi-functional furniture, such as storage ottomans that double as extra seating and coffee tables with built-in drawers to keep clutter at bay.
- Keep furniture profiles relatively low to the ground; low-backed sofas and streamlined entertainment units create an optical illusion of greater vertical space.
Before making any final commitments, spend an afternoon browsing a well-stocked furniture store to physically test the comfort, scale, and assembly configurations of various pieces. Look specifically for collections designed for flexible living spaces, ensuring that your seating can easily adapt whether you are hosting a crowded Super Bowl party or curling up for a quiet family movie night. By choosing pieces that perfectly fit the unique proportions of your below-grade space, you will create a harmonious, inviting environment where your family will love to gather for years to come.
Turning a dark, forgotten basement into a fully finished family room is a profound transformation that alters how you experience your home. By systematically addressing the hidden challenges of below-grade spaces—moisture control, environmental safety, mechanical upgrades, and precise electrical and structural layouts—you ensure that your aesthetic investments are built upon a rock-solid foundation. While the prep work requires patience, meticulous planning, and professional expertise, the final result is entirely worth the effort. You gain an entirely new level of your home customized precisely to your family’s lifestyle, providing a warm, protective, and joyful space where memories will be made for decades.